Tuesday, September 26, 2023

Chalkboard Technique 2

Here is the last post for "Back to School" Therapy Card Nite for August.  I brought back an old technique done a new or different way.  Instead of using Versa Mark and chalks, we just used Craft White on the black cardstock for this same type of look.  This card uses the Paint Texture BG Embossing folder and Real Red Cotton Ribbon along with some red gems.  I am showing this technique in 3 different layouts.  Which one is your favorite?


Wednesday, September 6, 2023

HB2U

YIKES!!!  Didn't realize how long it had been since I last posted.  Really am trying to be better about that.   I've got some ideas on things I would like to try with my blog, it's just a matter of time and how to.  So be sure to keep coming back!

This card is from Back 2 School Therapy Card Nite last month.  With that being said, all my Therapy Card Nites have a "theme" that usually goes with whatever is the next "holiday" mixed with a play on words.  My Back 2 School nite was a great play on words as we used techniques, colors, and the cards themselves to match.  Such as this card shown here.  We used the Large Alphabet & Letters Framelite Dies with your basic colors.  I would love to see your creations with this theme in mind.  Please feel free to share what you've made.   You can always check out my Stampin with Julia Facebook page for other cards I've made.


STAMPS: NONE
INKS: NONE
PAPERS: Pear Pizzaz, Real Red, Daffodil Delight, Balmy Blue, Flashback DSP (retired)
ACCESSORIES: Large Alphabet & Letters Framelite Dies, Mini Stampin' Cut & Emboss Machine, & Real Red Cotton Ribbon


Stampin' UP! Sept-Dec Mini Catalog is here...


Be sure to check out the new Mini Catalog!  There is a lot of great things in it!  One of my favorites is the Night Divine Bundle with the O Holy Night 12X12 DSP!   Not to mention the Autumn Leaves Bundle with the All About Autumn 6X6 DSP that I will be featuring in my upcoming Therapy Card Nite classes!  You do not want to miss out!!!  A few things have already sold out, but don't despair they will be back in stock soon!!!


Tuesday, July 25, 2023

Christmas Woods in July

We had Christmas in July Therapy Card Nite this month and this is the Christmas card that we made!  I got this fun fold layout idea from Lisa Freeman (sorry I don't remember who she credited).  I just thought these were so pretty and easy to make to boot!!!


We used a half a sheet of cardstock 5 1/2 x 8 1/2 and scored it at 4 1/4 & 1 1/2 inches.


Here are all the pieces that are needed to complete the card.  Base of card, I'm using Lost Lagoon, 5 1/2 x 8 1/2, DSP see below, inside message layer 1 7/8 x 5 1/4", extra side front strip 1 x 5 1/4 and lastly the greeting which for me ended up being 3 3/4 x 1" of white layered on 3 7/8 x 1 1/8" of Lost Lagoon.


Our One Horse Open Sleigh DSP (designer series paper) comes in 6 x 6 sheets.  You get 48 sheets total with 4 each of 12 designs.  For this card you need to cut your DSP down to 6 x 5 1/4".   Start by cutting off  3/4" (top piece) and then cut the rest down to (in order shown across) 2 3/4, 1 1/4, & 2".


Now all there is to do is assemble your card!  Be sure to only tape the first piece (the one with the brown tree trunk) to only the folded back flap on the front of the card so that you can open the card all the way.  See how the card looks when fully open.

 
I so enjoyed this card and so did the girls that when we do our Christmas Therapy Card Nite we will be using this fun fold again with other DSP from this paper pack.  

Hope you enjoyed this card.  Be sure to leave a comment and let me know what you think!!!

STAMPS: Season's Greetings
INKS: Lost Lagoon
PAPERS: Lost Lagoon, Basic White, One Horse Open Sleigh DSP
ACCESSORIES: Rhinestone Basic Jewels, Stampin' Dimensionals


Wednesday, June 21, 2023

Woodsy Kinda Card

Hey!  Sorry it's been a hot minute, but this month all of a sudden got very busy!  In a good way and it will probably be a few weeks before I have a chance to post again.  So this one will be kind of quick.

Here's some examples from one of the cards from It's A Guy Thing Card Nite last month.  The only one missing is the Father's Day sample as that went to my dad.  I didn't realize until now that I did not get a picture of it, but you get the jist of how it would have looked. The girls got their pick from either the Father's Day saying or the Happy Birthday saying.  I just made up the last 2 "thinking of you" cards from what was left over to have in my stash.    


I used the New Horizons DSP I had left over from last year. I really like how no 2 cards are alike when it comes to using this DSP.


I pulled out the Woodland embossing folder along with the Grove Dies and the Grassy Grove stamp set to create these cards.


Keep coming back to see some of the new DSP along with a fun fold.


STAMPS: Grassy Grove
INKS: Tuxedo Black Memento
PAPERS: Early Expresso, Sahara Sand, Garden Green, On the Horizons DSP
ACCESSORES: Grove Dies, Big Shot, Banner Triple Punch, Coluzzle (retired; used to cut circle)
 

Tuesday, May 23, 2023

Rose Wonder slim-line birthday card

Finally, I can post this GORGEOUS Rose Wonder slimline card that I made for my best friend, Becca, up in Iowa.  And yes, she loved it!

I used the same technique that I made the Mother's Day cards with that are on my Facebook page, Stampin' with Julia. (Be sure to go check it out and leave a comment) I have found that I am really loving the Blending Brushes to color with.  It works really well with outline stamps like the Rose Wonder set used here.

My slimline card measures 8 1/2" X 4", although you could do 9" X 4" and it will still fit a long envelope.  Unless of course you have an envelope maker where you can make any size card you'd like.  I stamped my rose image and then used the blender brushes to color them in.  I then stamped the saying and cut that out and used dimensional to "pop" it up off the card and topped it off with a few "gems".


STAMPS: Rose Wonder
INKS: Tuxedo Black Memento, Gorgeous Grape, Granny Apple Green
PAPERS: Basic White, Basic Black, Gorgeous Grape
ACCESSORIES: Rose Garden Thinlits Die, Big Shot, Seam Binding Ribbon, Purple Bling Stickers (gems) by Jolee's Boutique


Friday, April 14, 2023

Written in the stars...

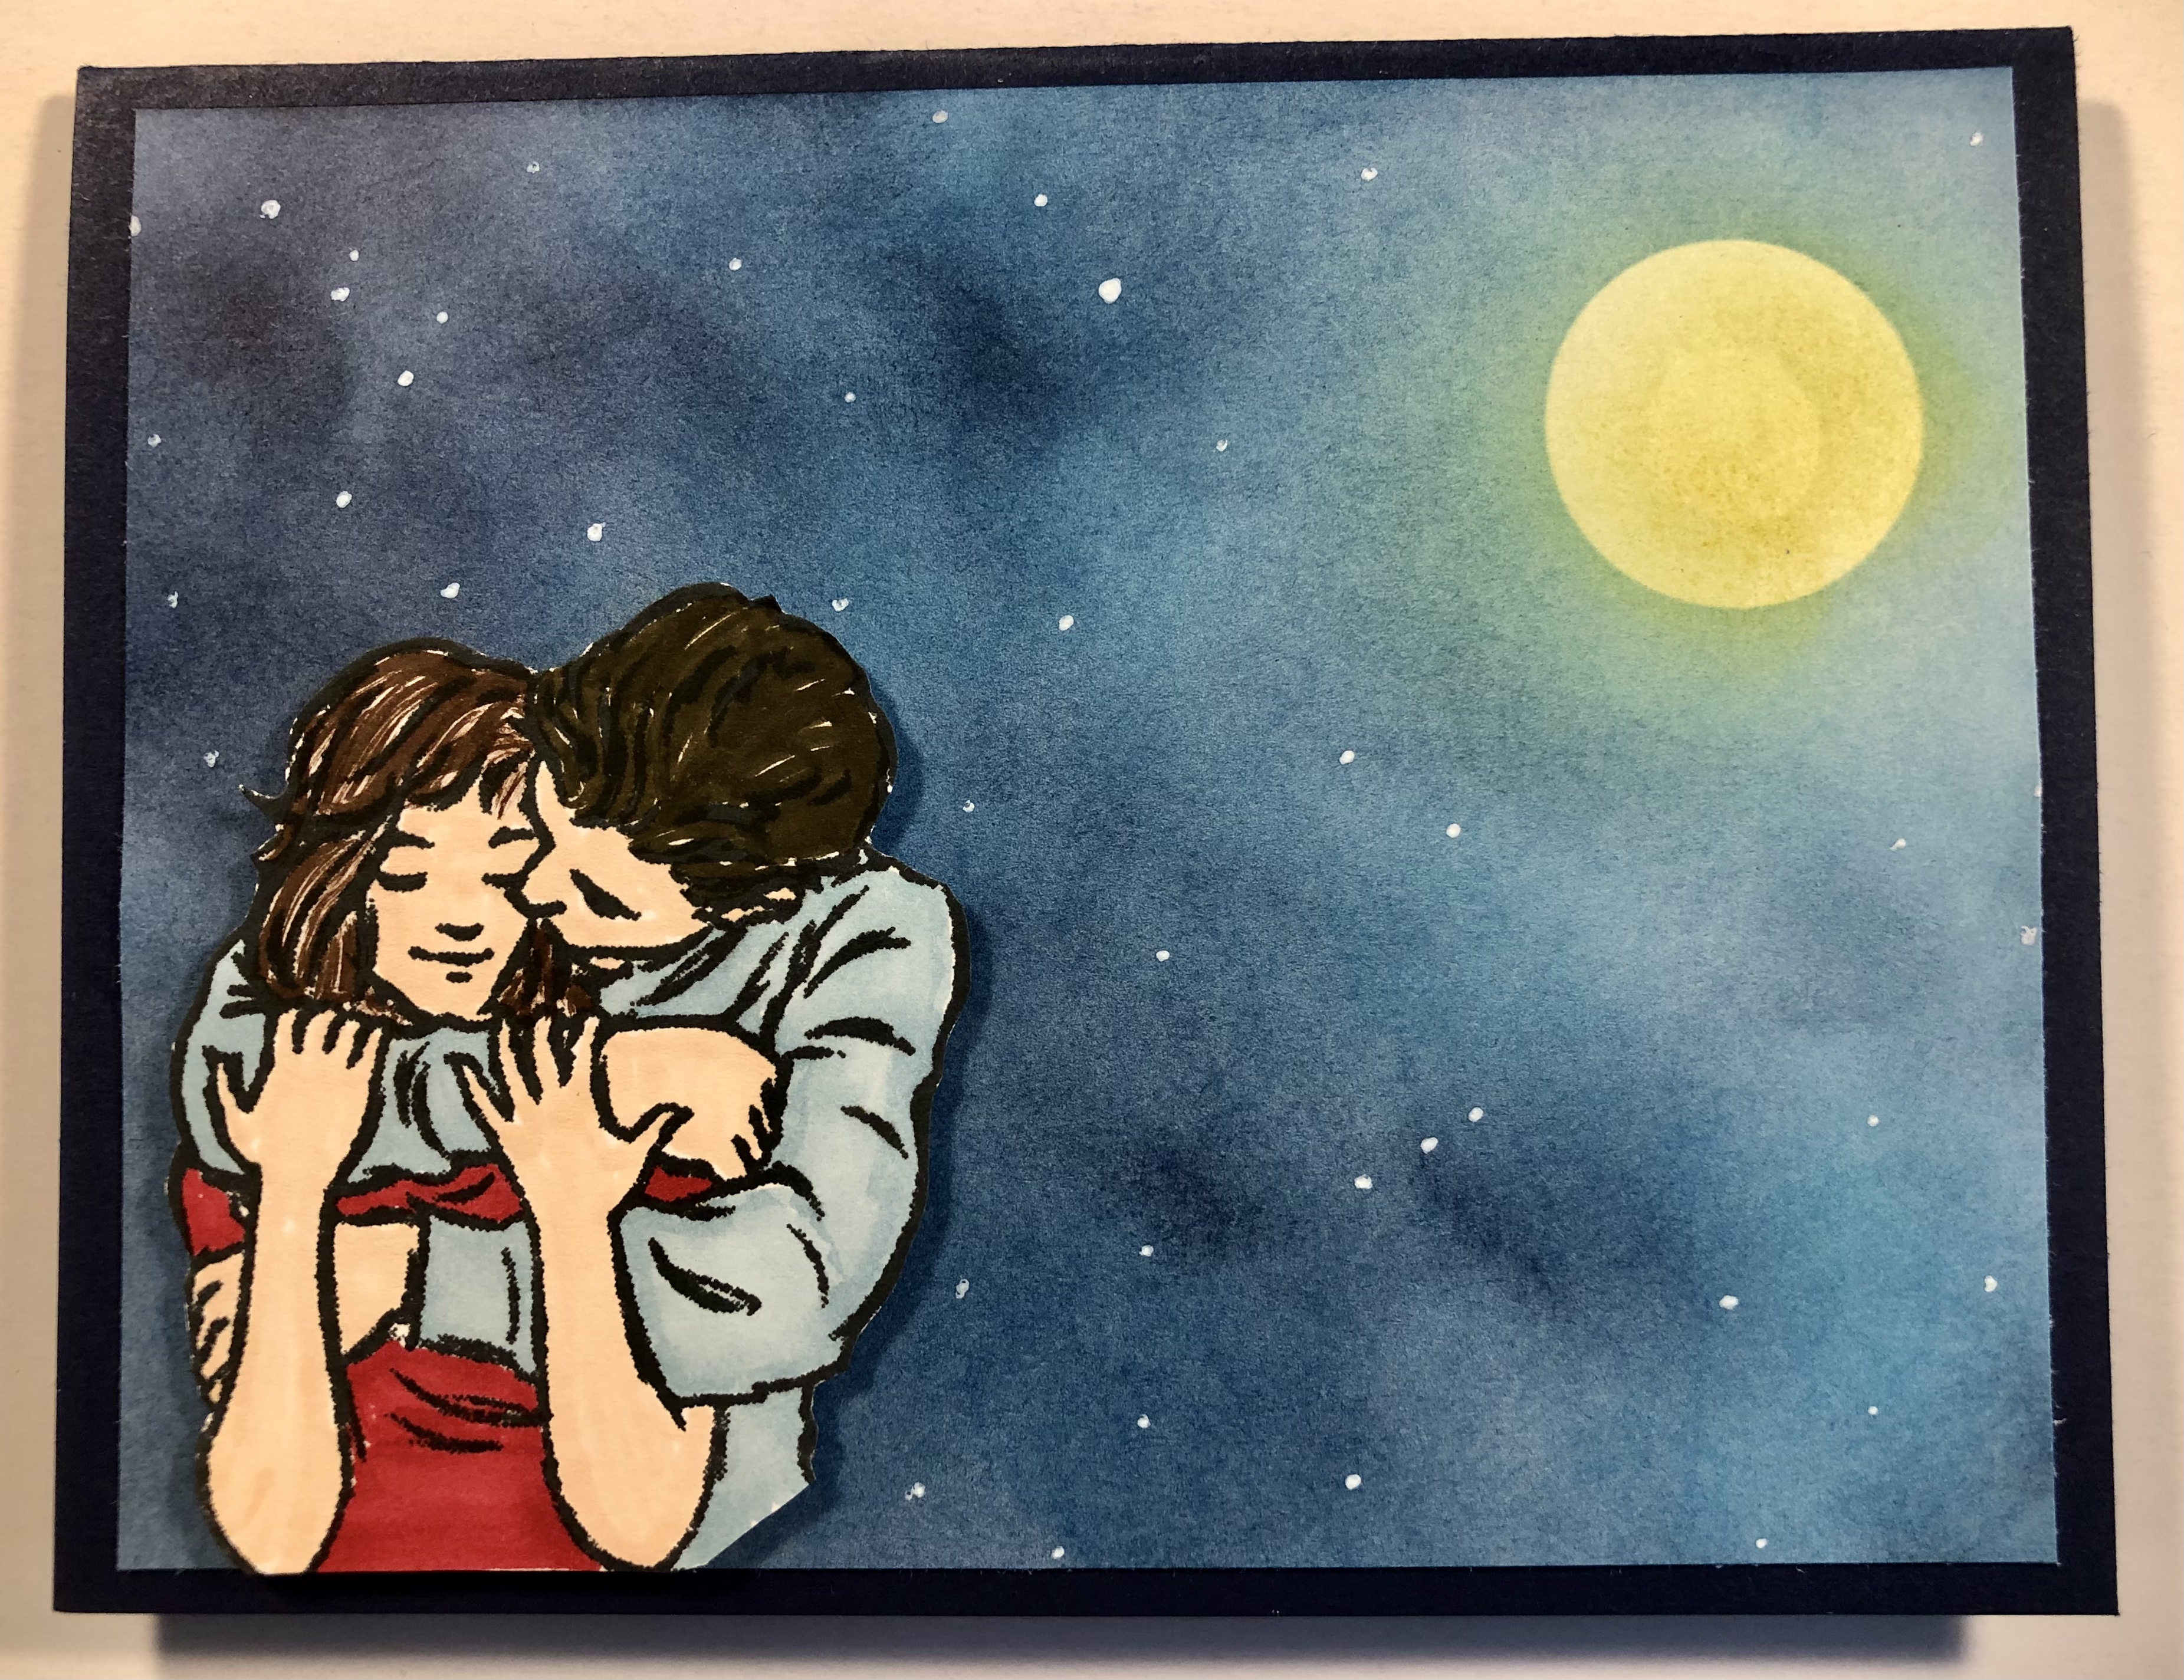
Tomorrow is my 5-year anniversary and so I whipped up this card I've been thinking about for over a week now.   Our "main" song is "Written in the Stars" by Old Dominion, so I felt this card was very fitting to go with this anniversary.


I started with you Basic White card stock 4 X 5 1/4.  I punched out a circle with the 1" circle punch.  Got my blending brush and inks out along with stamping my main focal point out and coloring it with  Stampin' markers and Stampin' blends.


I started with the Balmy Blue and blended the color around where the moon would go.


I then started adding Pacific Point blending until I was happy with the color blend.  I then followed that up with Night of Navy and did the same thing until I got my desired look.


Afterwards I removed my circle that covered where my moon was going to be and I then added some Daffodil Delight to color the moon yellow.  I blended it out a bit into the sky so it looked like it was shining a bit.


As you can see here the moon is blended and I then took a white gel pen and added the stars.  If you look closely enough, I did put in a few constellations.  Can you find them?  I matted this on Night of Navy cardstock and added my focal point of the couple with some Stampin' Dimensionals

I did print out something to add to the inside, but I really like how this turned out.

Please leave a comment below and let me know what you think.


STAMPS: Embrace Each Moment
INKS: Night of Navy, Pacific Point, Balmy Blue, Tuxedo Black Memento, Stampin' Markers & Blends
PAPERS: Night of Navy & Basic White
ACCESSORIES: 1" Circle Punch, Blending Brushes, White Gel Pen, Stampin' Dimensials